Managing eSignature Documents
How to send eSignature documents to Onboarded employees, add recipients to eSignature documents and filter employees by eSignature document status.
OVERVIEW
With the Manage eSignature feature, you can send multiple eSignature documents to employees. eSignature documents can be sent to specific employees or to groups of employees by org unit. You can also add optional participants to either approve or sign the documents.
Refer to this video:eSgnature Overview (vimeo.com)
SENDING ESIGNATURE DOCUMENTS
To send an eSignature document to employees:
-
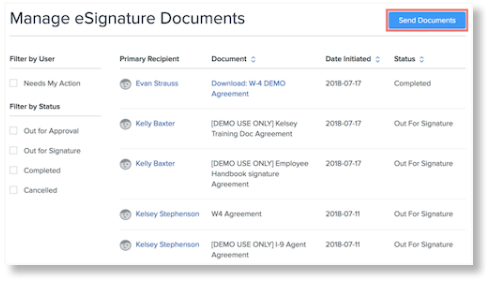
Click Manage eSignature on the homepage.
-
Click Send Documents.
-
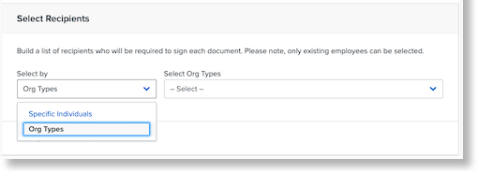
Use the Select by dropdown to send to Specific Individuals or by Org Type.
-
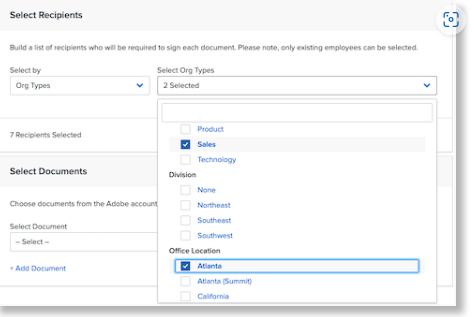
Use the Select Individuals and Select Org Types dropdown to choose your recipients.
-
Select All options to send the documents to all employees or org units.
-
Selecting multiple org units has an additive effect. For example, selecting "New York" and "Accounting" sends documents to all New York employees and all Accounting employees, not Accounting employees in New York.
-
If an employee belongs to multiple selected org units, they will only receive the document once.
-
-
Select a Document to send.
-
Documents are stored in your Adobe account.
-
Enter an Additional Recipient to receive the document (optional).
-
Select a Role for the additional recipient.
-
You can select Approve or Sign.
-
-
To add another document, click Add Document.
-
Click Send. Recipients will receive their documents via email.

Once documents have been signed, recipients will receive a confirmation email with copies of the completed documents.
USING FILTERS
You can filter employees by the status of their eSignature documents. Select the appropriate checkboxes to view by the following statuses:
-
Needs My Action: View employees whose documents require your signature or approval.
-
Out for Approval: An eSignature document has been sent and is awaiting approval from a participant.
-
Out for Signature: An eSignature document has been sent and is awaiting signature from a participant.
-
Completed: An eSignature document has been signed and/or approved by all required recipients.
-
Cancelled: An eSignature documents has been cancelled on the Adobe website.
CANCELING AND HIDING DOCUMENTS
Administrators can cancel eSignature documents that have not been signed, or hide eSignature documents that have been completed, on the recipient’s My eSignature page.
Cancel an eSignature Document
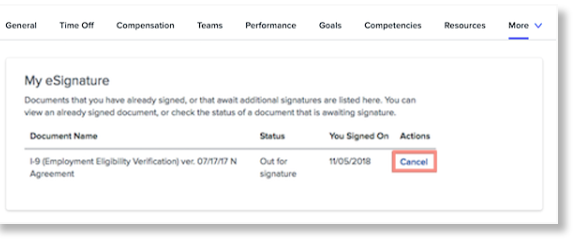
To cancel an eSignature document that has not been signed (out for signature):
-
Go to the employee’s My eSignature page.
-
Find the eSignature document.
-
Click Cancel.
Hide an eSignature Document
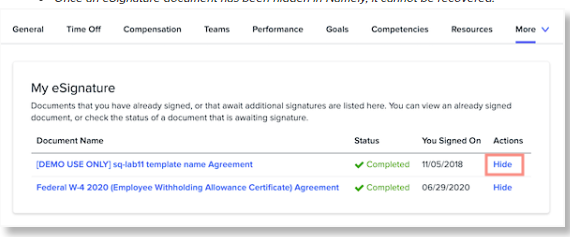
To hide an eSignature document that has been completed:
-
Go to the employee’s My eSignature page.
-
Find the eSignature document.
-
Click Hide.
-
Once an eSignature document has been hidden in Namely, it cannot be recovered.
TIPS
-
eSignature documents canceled in Namely will also display as canceled in your Adobe account. However, eSignature documents hidden in Namely will still display as “completed” in Adobe. Log in to your Adobe account if you want to update the status there.
-
The status of eSignature documents hidden (ie: deleted) via your Adobe account will not change in Namely. Follow the steps above to change their status in Namely.